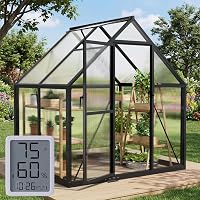
How to Assemble a Greenhouse Kit
To assemble a greenhouse kit, build the frame on a level base, tighten the braces, then attach the cover or panels. Fit the door and vents last, then anchor everything so the frame stays put in wind.
On this page (9 sections)
- What should you check before you start assembling?
- Which tools and helpers do you need for the frame?
- How do you build the frame in the right order?
- How do you fit the cover or panels without tearing them?
- How do you fit the door and vents so they close properly?
- How do you anchor the frame and keep it stable?
- How do you keep the cover tight with a lock channel?
- What should you do after assembly, and how do you care for the kit?
- Which greenhouse kit is easiest to assemble?
To assemble a greenhouse kit, build the frame on a level base, tighten the braces, then attach the cover or panels. Fit the door and vents last, then anchor everything so the frame stays put in wind.
Work from the base up and in the order the maker lists. A calm, dry day and a second pair of hands make every step easier.
If you're still choosing between kit styles, our guide to greenhouse kits compares walk-in, pop-up, mini and polycarbonate types first.
What should you check before you start assembling?
Check the parts list and lay everything out before you touch a bolt. The kit maker's instructions are the first thing to read, since each kit has its own pole order, fittings and fastener counts.
Count the poles, connectors, screws, nuts and panel clips against the box list. Small parts go missing easily, and a missing corner fitting can stop the whole frame.
Keep them in a tray or bucket as you unpack.
Clear a flat area beside the build spot so you can sort parts without walking over them. Check the ground is level and that no pipe or cable runs under the footprint.
Have the maker's instructions open, plus a tape measure and a helper.
Read the instructions all the way through once before you start. The order often changes partway, and knowing what comes later stops you from bolting a joint that has to come apart again.
A kit with an included installation guide, like the VEVOR lock channel set, is easier to follow when you read the whole guide first.
Which tools and helpers do you need for the frame?
A screwdriver, adjustable wrench, rubber mallet, step ladder and work gloves cover most kit assemblies. Some kits include a small wrench; check yours before buying tools.
A rubber mallet seats push-fit poles without cracking the coating. A step ladder reaches the ridge on a walk-in tunnel.
Gloves protect your hands from sharp panel edges and cut ends.
Two people matter more than any tool. One person holds a long pole steady while the other fixes the connector.
A helper also pulls the cover evenly over the frame, which keeps it from snagging on the joints. Wind is the main enemy, so pick a still day.
Keep a tape measure and a level within reach as well. A level tells you when an upright is true before you fix it, and a tape measure confirms that matching frame sections are the same length.
A short ladder helps on a tunnel roof, and a tray of fasteners keeps small parts from rolling away.
How do you build the frame in the right order?
Assemble the base rails, then the uprights, then the roof and braces. Most kits start at ground level and work upward so each section supports the next.
- Connect the base rails and check the corners are square.
- Fit the uprights to the base and stand them straight.
- Add the roof or hoop pieces and the ridge.
- Fix the diagonal braces and corner supports.
- Tighten every fastener once the frame is square.
Don't fully tighten bolts until the whole frame stands. A little slack lets the poles line up, and you can tighten everything at the end.
Keep the door opening clear and check it lines up as you go. The VEVOR tunnel kit adds reinforced door poles and diagonal bars for stability.
Its frame uses galvanized pipes with a 1 in diameter and a 0.02 in wall thickness, so the joints can feel stiff to push together. A rubber mallet helps seat them without bending a pole end.
How do you fit the cover or panels without tearing them?
Attach the cover loosely, square it up, then pull it even and fix the edges. For polycarbonate panels, slide each one into its channel before tightening the clips.
Unroll a PE cover and drape it over the frame without dragging it across sharp joints. Pull it down on each side in turn so the seams sit straight.
A helper at each corner keeps the cover from snagging on a pole end.
The VEVOR tunnel cover is 140g/m² PE with double-stitched seams. Its edges extend past the frame so you can weight them or bury them in soil.
For polycarbonate, follow the maker's panel order and keep the protective film on until the last panel is seated. The HOOYEAH kit uses semi-translucent polycarbonate panels over an aluminum frame.
These panels are milky white rather than clear, so they diffuse light rather than let it straight through. Keep the edges in their channels and tighten the clips in small steps so a panel doesn't crack.
How do you fit the door and vents so they close properly?
Fit the door after the cover or panels, then check it swings or zips freely. Add the vents last, and test each one opens and closes fully.
On a zipper door, check the double-layered cover flap sits over the zip before you close it. A zip that catches means the cover is pulled too tight on one side.
Loosen and re-pull that edge.
Vent windows need their mesh and Velcro edges lined up flat. Open and close each one to confirm the flap seats.
The VEVOR tunnel has 8 windows and a large zipper door; the HOOYEAH kit uses one adjustable roof vent plus a lockable door. Tighten the door frame fixings only after the door runs freely.
A roof vent that sticks usually means a fitting is over-tightened, so back it off a turn and test the swing again.
How do you anchor the frame and keep it stable?
Stake the base and tie the frame down as the instructions show. A kit that isn't anchored moves in the first strong gust and can rack the frame out of square.
Push U-shaped stakes into the ground at the base points. Fit the tie-downs or straps the maker supplies.
Weight or bury the extended cover edges so the cover can't lift and pull on the frame.
The VEVOR tunnel kit includes U-shaped stakes, tie-downs and plastic hooks. Sit the kit where a fence, wall or shrubs break the wind, and avoid a fully exposed spot.
Check the anchors again after the first windy week and re-tighten anything that has loosened. A tunnel this size needs firm ground at every stake point, so push each stake in as deep as it will go rather than tapping it partway.
How do you keep the cover tight with a lock channel?
Fix an aluminum lock channel to the frame with screws, lay the cover over it, then press the spring wire into the groove. The wire traps the cover and holds it taut.
This method works well for a poly film or shade cloth on a hoop frame. The VEVOR channel set includes 20 channels and 20 PVC-coated spring wires at 6.56 ft each, with screws.
The channels are aluminum alloy and can bend to fit a curved frame. The PE-coated wire flexes so it grips the film without cutting it.
Fitting a lock channel around a hoop frame
Measure your hoop spacing before fitting channels. Space them evenly around the frame so the cover doesn't sag between them.
Re-press the wire if a cover corner works loose over time. The channel is 1.2 in wide and 0.05 in thick, so it follows the curve of a hoop without kinking.
Bend it slowly by hand as you screw it on. The wire pulls out again for a seasonal cover swap.
What should you do after assembly, and how do you care for the kit?
Check every fastener, test the door and vents, then watch the kit through its first windy week. Re-tighten loose bolts and re-seat any cover edge that has lifted.
Run a hand along the frame to feel for loose joints. Check the cover seams and panel clips for any snags.
Clear soil or debris from the base so water drains away rather than pooling inside. A kit that stays level and dry lasts longer than one sitting in a puddle.
Before winter, look over the cover or panels and the anchors again. A kit set up well in fall holds up better in cold weather.
For cold-season setup and kit choices, our guide to the best greenhouse for winter covers covers, insulation and placement. When you're picking a kit from scratch, our roundup of the best greenhouse kits compares frame types and sizes.
Which greenhouse kit is easiest to assemble?
A mini or pop-up kit goes up fastest; a polycarbonate walk-in needs more time but holds up to weather. For most backyard growers, a polycarbonate kit with a clear assembly order is the simplest long-term choice.
The HOOYEAH 6 x 10 ft kit uses an aluminum frame and a simplified lock system the maker calls quick to install. Its polycarbonate panels and lockable door suit a backyard spot with some wind shelter.
The VEVOR tunnel kit is larger at 14.6 x 6.4 x 6.3 ft and takes longer to build, but its galvanized frame and 8 windows suit a bigger growing space. A lock channel set like the VEVOR bundle helps keep a film cover tight.
If you're comparing kit sizes and materials for a home garden, our guide to the best home greenhouse kits helps you match frame type and cover to your space. Start with the maker's instructions, build square, anchor well, and your kit will stand through the season.
Frequently asked questions
How long does it take to assemble a greenhouse kit?
Plan most of a day for a walk-in kit and a couple of hours for a mini or pop-up kit. Two people speed up the frame work, and a calm, dry day is easier than working in wind.
Do you need two people to put up a greenhouse kit?
Yes for most walk-in kits. The frame poles are long and a cover catches wind quickly, so a second set of hands makes the job safer and faster.
Mini kits can often be handled by one person.
Should the greenhouse kit go on concrete or on soil?
Follow the maker's instructions for your kit. A firm, level base matters most, so many buyers choose a patio slab or a compacted soil pad.
A flat base keeps the frame square and the door lined up.
How do you stop a greenhouse kit blowing over?
Anchor the frame as the instructions direct. U-shaped stakes, tie-downs and weighted or buried cover edges all help.
Place the kit where a fence or wall gives some wind shelter.